When it comes to compact cars, the Honda Beat has stood out as a unique offering in the automotive market, capturing the hearts of driving enthusiasts.
However, like any vehicle, the Beat is not without its issues. Understanding the common problems associated with this vehicle can help owners and potential buyers make informed decisions about maintenance and purchase.
In this article, we’ll dive into the prevalent issues that owners face with their possible solutions.
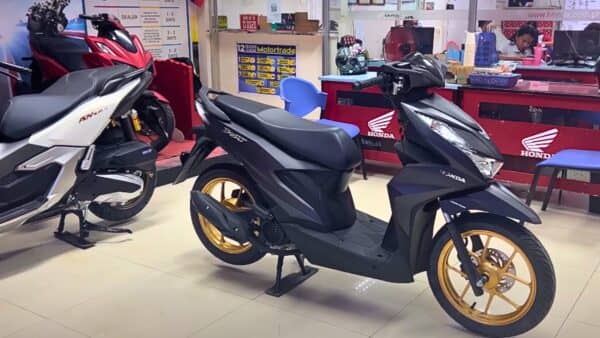
Honda Beat Problems
Most of the owners have reported issues with its aging carburetor system, which can lead to difficulty in starting and irregular idling.
However, most of the owners have reported issues with their engines, excessive oil consumption, and clutch transmission issues.
1. Starting Issue
One common issue owners have faced is related to the starting and malfunctioning starter motor.
When the starter motor wears out or fails, it can result in a clicking sound when the ignition key is turned or a complete failure to engage the engine.
This problem may stem from electrical issues, such as a weak battery or poor wiring connections, or from mechanical failures within the starter motor itself.
To diagnose and resolve this issue, begin by checking the battery’s voltage to ensure it has sufficient charge to turn the engine.
If the battery is charged but the problem persists, inspect the wiring connections to the starter motor for any signs of corrosion or looseness.
If the connections are secure and corrosion-free, it may be necessary to test the starter motor directly.
This often involves removing the starter and performing a bench test to assess its condition. If the starter motor is found to be defective, replacement will be required.
It’s important to approach this issue methodically, as jumping to conclusions could lead to unnecessary replacements and expenses.
2. Overheating
Overheating can be attributed to several factors, including a malfunctioning thermostat, which may fail to open and cause the engine to overheat.
However, a compromised water pump could lead to improper coolant circulation, further exacerbating the temperature rise.
Clogged radiators also pose a threat as they prevent the necessary heat exchange and leaks within the cooling system.
It can lead to a loss of coolant, decreasing the system’s efficiency and causing the engine’s temperature to spike.
Related: Honda Dio Scooter Problems
It is crucial to regularly check coolant levels, monitor engine temperature, and observe any signs of leaks or malfunctioning components.
In the event of overheating, it is advised to pull over safely and turn off the engine to allow it to cool.
Maintaining a well-functioning cooling system is essential for the longevity and performance of the Honda Beat.
3. Misfiring
Misfiring issues can arise from various components within the engine management system.
When your scooter starts to misfire, it may exhibit symptoms such as uneven idling, loss of power, or an increase in exhaust emissions, leading to a decline in fuel efficiency.
To diagnose the problem, inspect the ignition system components, such as spark plugs, ignition coils, and distributor caps, as these can be common culprits.
It is also advised to check the fuel system for clogged fuel injectors or a malfunctioning fuel pump, which can impede the engine’s ability to receive the correct fuel-air mixture.
However, the engine’s timing belt or chain must be inspected for proper alignment because incorrect timing can lead to misfires.
Ensuring that airflow sensors and oxygen sensors are functioning correctly is equally important, as these sensors regulate and monitor the air-to-fuel ratio.
If these inspections do not uncover the issue, it could be an indication of more complex engine problems, such as a vacuum leak, a faulty throttle position sensor, or a problem with the engine control unit (ECU).
For a thorough assessment, a professional diagnostic tool may be necessary to read any fault codes from the ECU that could pinpoint the exact cause of the misfire.
4. Excessive Oil Consumption
The Honda Beat has been noted for issues related to excessive oil consumption.
This problem has been a point of concern for owners, where it tends to use more oil than expected, leading to frequent top-offs between scheduled oil changes.
The roots of the issue often lie in the wear and tear of engine components such as piston rings, valve seals, or even the use of incorrect oil types.
Over time, these components can degrade, leading to oil seepage into the combustion chamber, where it gets burned off, resulting in a gradual decline in oil levels.
To diagnose and fix the issue, it is crucial to verify the oil level and quality, ensuring that the correct oil grade is used.
However, a compression test can help determine if there are gaps in the engine’s internal seal.
If excessive wear is found, replacing piston rings and valve seals or even conducting an engine rebuild may be necessary.
Additionally, PCV valve checks should be performed as a clogged valve can cause increased pressure within the engine, exacerbating oil consumption.
5. Transmission Issue
Over time, most owners have experienced transmission issues that affect the driving experience.
Owners have reported symptoms such as difficulty shifting gears, a grinding noise when changing gears, and even occasional gear slippage.
This problem is often due to the wear and tear of the clutch assembly or misalignment of the transmission’s synchronizers.
To fully diagnose the issue, an inspection of the transmission system is recommended.
This includes checking the transmission fluid level and quality, examining the clutch pedal and linkage for proper adjustment, and ensuring the clutch plate and pressure plate.
It’s also crucial to investigate the transmission’s gears and synchros for signs of damage or excessive wear.
Follow these steps to resolve the issue:
- Start with a visual inspection of the transmission area for any obvious signs of leaks or damage.
- Check the transmission fluid, both the level and condition. If the fluid is dirty or low, replacing it may solve the problem.
- Test the clutch adjustment and pedal free play according to the specifications outlined in the Honda Beat’s service manual.
- If shifting issues persist, consider inspecting the clutch assembly and consider replacement if it shows significant wear.
- Have a professional mechanic examine the synchronizers and transmission gears for wear or damage. If necessary, the transmission may need to be disassembled for a full rebuild.
6. Electrical Problems
The Honda Beat, while revered for its compact design and efficiency, has had its share of electrical issues that owners should be aware of.
Among these problems is a faulty charging system, which can lead to the motorcycle struggling to start or losing power mid-ride.
Riders often report instances of dimming headlights and the battery not holding a charge, indicating potential alternator or stator failure.
Moreover, poor electrical connections can result in sporadic electrical behaviours across the dashboard.
Troubleshooting these issues includes checking the battery’s health with a multimeter, inspecting the alternator’s output, and ensuring that all connections are tight and corrosion-free.
If you’re unfamiliar with motorcycle maintenance, it’s advisable to consult a professional mechanic to avoid further damage to the electrical system.
7. Malfunctioning Alternator
The alternator is pivotal in powering the vehicle’s electrical system while the engine is running, as well as recharging the battery.
When an alternator begins to fail, it can result in symptoms such as dimming or flickering of the headlights and electrical accessories that operate slower than usual.
To resolve alternator issues, you should be aware of the warning signs; a battery warning light on the dashboard, unusual noises, or even a burning rubber smell can all indicate alternator distress.
To diagnose the problem, use a multimeter to check the voltage output at the battery terminals; a healthy alternator should produce around 13.5 to 14.5 volts.
If readings fall outside this range, further inspection of the alternator’s belt for looseness or wear is necessary.

Ahtsham Younas is a passionate blogger and content writer. He loves to ride motorcycles and learn the mechanical process behind the motorcycles.
He has been writing articles in the motorcycle industry since 2019 and has learned many things about motorbike niches.